
Google Docs™ has no LaTeX export of its own: File → Download offers formats such as Word, PDF and Markdown, but not .tex. (What the Markdown download does to equations is measured separately.) The LaTeXFlow add-on’s Export writes the document as a .tex file — headings, lists and equations included — that you can download or open directly in Overleaf. A Word document can take the same route: open the .docx in Google Docs™ first, then export.
This post follows one small document through every step of LaTeXFlow, from typing LaTeX in Google Docs™ to a downloaded .tex file and back again. Scan and Convert are free. Export and Import, on the Export / Import tab, need a license key. Each screenshot below was taken from the add-on as it is published on the Google Workspace Marketplace.
1. The document
The test document has a heading, a two-item bulleted list and four equations typed as LaTeX: three inline between $…$ and one display equation between $$…$$.
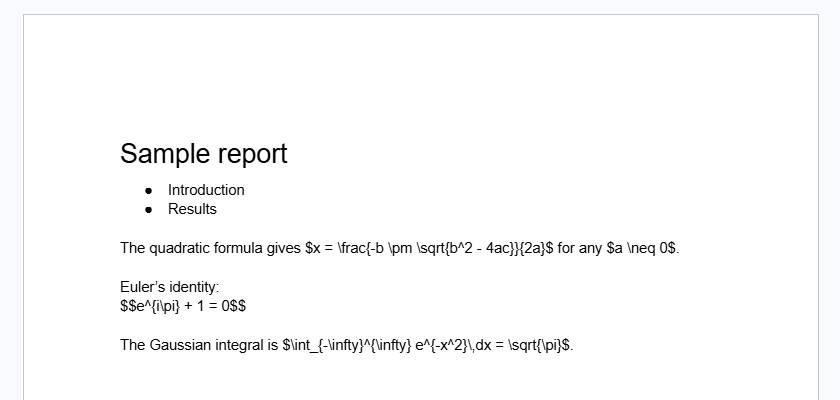
Open the add-on with Extensions → LatexFlow → Open Equation Panel.
If the LatexFlow entry is not in the Extensions menu of a new document, turn it on for that document: Extensions → Add-ons → Manage add-ons, open the menu on LatexFlow, and choose Use in this document. Reload the page and the entry appears.
2. Scan and Convert (free)
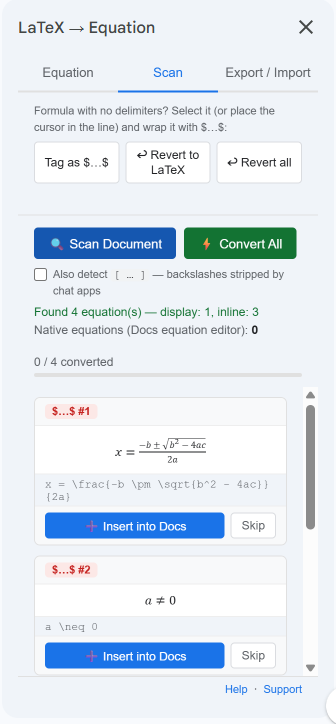
On the Scan tab, press Scan Document. The sidebar reports what it found — here, “Found 4 equation(s) — display: 1, inline: 3” — and lists one card per equation with a rendered preview and its LaTeX source.
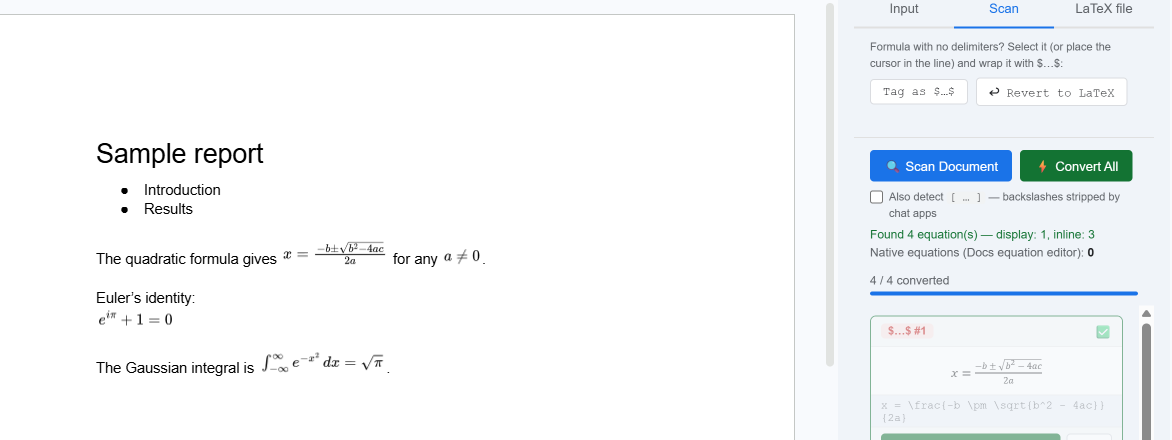
Press Convert All. Each LaTeX span in the document is replaced by a rendered equation, and the counter reads “4 / 4 converted”.
3. The Export / Import tab and the license key
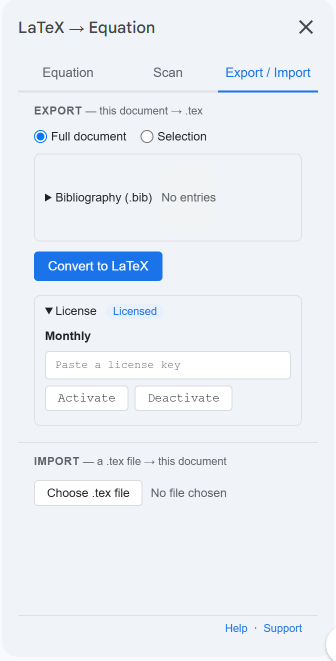
The third tab, Export / Import, holds Export (this document → .tex) and Import (a .tex file → this document). Without a key both are locked, and the tab shows a key field with an Activate button. One license covers both.
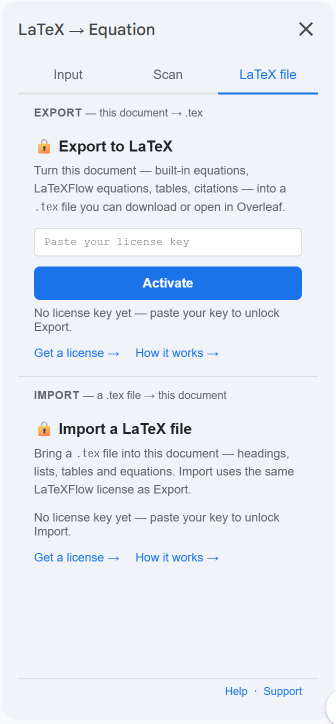
Short passes and subscriptions are sold on the LaTeXFlow store. The key arrives with the purchase. Paste it into the field and press Activate. The License section then shows Licensed, and the Export and Import controls appear.
How activation works, how to cancel a subscription and how refunds are handled are covered in the Export guide.
4. Export: Google Docs™ to LaTeX
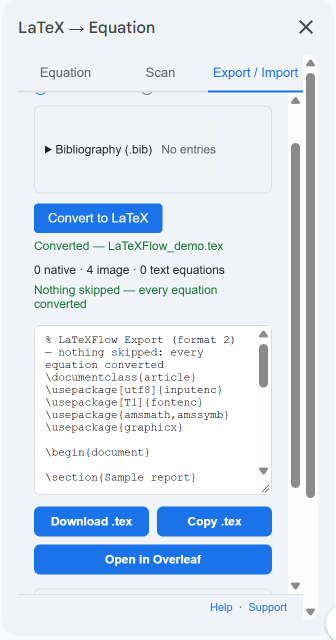
With Full document selected, press Convert to LaTeX. The result for this document:
- “Converted — LaTeXFlow_demo.tex”
- “0 native · 4 image · 0 text equations” — the four equations converted in step 2 are counted as image equations
- “Nothing skipped — every equation converted”
Below the summary is a preview of the file, with Download .tex, Copy .tex and Open in Overleaf.
The preview scrolls through to \end{document}. Beside the rendered document you can check that the heading became \section, the bullets became an itemize list, and each equation came back as LaTeX.
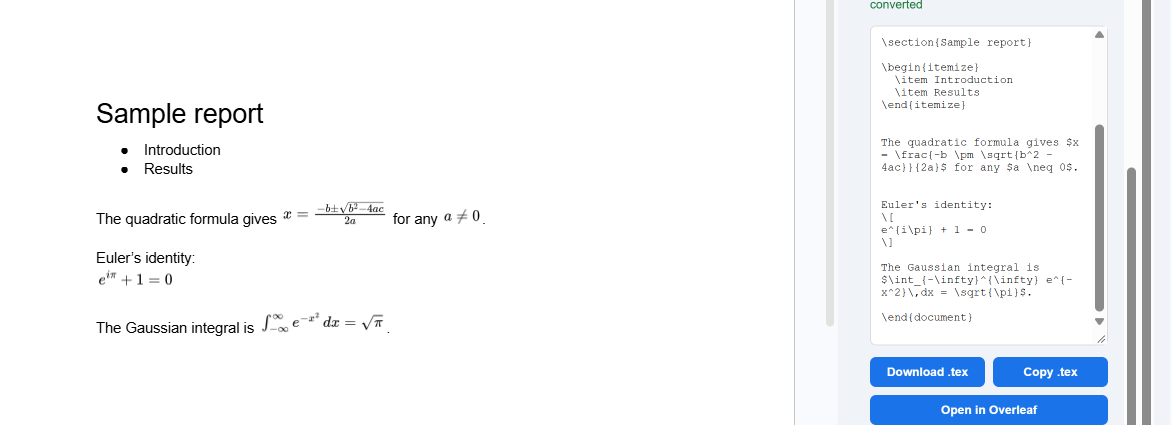
This is the file Download .tex saved, unedited:
1
2
3
4
5
6
7
8
9
10
11
12
13
14
15
16
17
18
19
20
21
22
23
24
25
% LaTeXFlow Export — nothing skipped: every equation converted
\documentclass{article}
\usepackage[utf8]{inputenc}
\usepackage[T1]{fontenc}
\usepackage{amsmath,amssymb}
\usepackage{graphicx}

\begin{document}

\section{Sample report}
\begin{itemize}
  \item Introduction
  \item Results
\end{itemize}

The quadratic formula gives $x = \frac{-b \pm \sqrt{b^2 - 4ac}}{2a}$ for any $a \neq 0$.

Euler's identity:
\[
e^{i\pi} + 1 = 0
\]

The Gaussian integral is $\int_{-\infty}^{\infty} e^{-x^2}\,dx = \sqrt{\pi}$.

\end{document}
The display equation typed between $$…$$ is written as \[ … \], and the inline equations stay in $…$.
5. Import a .tex file
Import goes the other way. In the Import section of the same tab, press Choose .tex file and pick the file. Before anything is written, the sidebar summarises what it read. For the file above: “4 equations (1 display) — written as LaTeX text”. Import into: names the document tab the content will go to; Use current tab switches it to the tab you are in. Press Import.
Import does not create a tab. It writes into the tab that was open when you picked the file, adding to the end. For this walkthrough an empty tab named “Imported” was opened first. If the tab already has content, the sidebar asks you to tick Append anyway before anything is written.
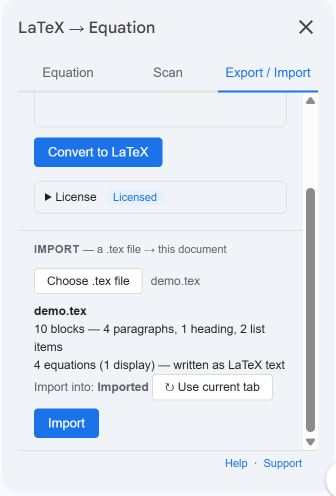
The heading and the bulleted list come in as a Docs heading and a Docs list. The equations come in as LaTeX text.
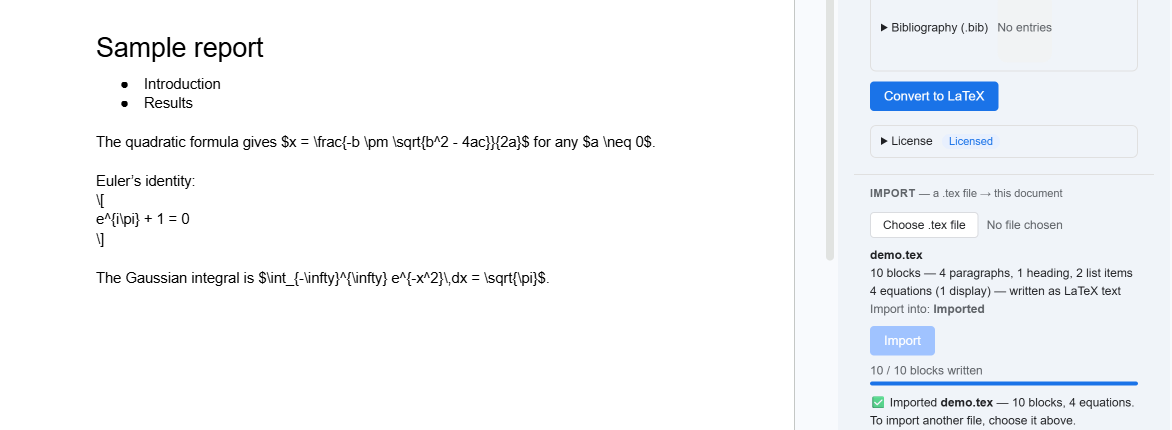
That is by design: Import writes equations as LaTeX text, not as images, so they stay editable. To turn them into rendered equations, open the Scan tab in the imported tab and run Scan Document and Convert All again, as in step 2. Two real documents taken out to LaTeX and back, and what changed on the way, are in what survives the round trip.
6. Where to go next
- Passes and subscriptions: LaTeXFlow store
- Activation, cancelling and refunds: Export guide
- First-time install and the free features: install walkthrough